
There is a particular kind of morning every woman over 50 knows. You look in the mirror, and your skin looks a little drier than it did ten years ago, your eyes a little more tired, and the makeup that once took five minutes now seems to settle in places it never used to. Nothing dramatic has changed, and yet the old routine does not quite work the way it did. That is not a failure of your face. It is a sign that your skin has changed, and your makeup routine simply needs to change with it.
The good news is that everyday makeup after 50 is not about more products, more steps, or more skill. It is about softer choices. Lighter textures instead of heavy ones, cream instead of powder where skin is dry, a gentle hand instead of a firm one. When you switch to formulas that move with your skin rather than sitting on top of it, makeup stops fighting you and starts flattering you again. The goal is not to look younger. The goal is to look like yourself on a good day, rested, fresh, and put together.
This guide gives you twelve tips that work together as one simple routine, from primer to setting spray. Each tip explains why it works, gives you one thing worth remembering, and lists the pieces so you can rebuild the look from what you already own. You do not need to buy twelve new products. You need to understand twelve ideas, and then let the products you love do their best work.
As an Amazon Associate, we earn from qualifying purchases.
How to use this guide
Start with your skin, not your makeup bag. Read through the twelve tips once, then pick the two or three that solve your biggest morning frustration, whether that is foundation settling into fine lines, lipstick feathering, or eyeshadow fading by lunch. The summary table up top lets you scan all twelve in under a minute; the sections below explain the reasoning, so you can apply the same principle to products you already have at home.
Quick Scan Summary
| Tip | Best for | Why it works |
|---|---|---|
| Start With a Hydrating Primer | Dry or uneven skin | A grippy, moisturizing base smooths skin and helps makeup last |
| Choose a Lightweight Foundation | Everyday coverage | A serum style formula evens tone without settling into lines |
| Brighten Under Eyes With a Light Hand | Tired eyes and dark circles | A small amount of creamy concealer brightens without creasing |
| Let Cream Blush Do the Lifting | Dull or flat looking cheeks | Cream color melts into skin and gives a healthy, lifted glow |
| Fill Brows Softly, Never Harshly | Sparse or fading brows | Fine, hairlike strokes frame the face without looking drawn on |
| Keep Eyeshadow Matte and Close to Your Skin Tone | Mature eyelids | Soft matte neutrals flatter lids while shimmer can emphasize texture |
| Smudge Your Eyeliner, Never Draw a Hard Line | Eyes that water or lids that crease | A softened line defines eyes gently and stays flattering all day |
| One Coat of Mascara, Applied Slowly | Short or fine lashes | A slow, single coat builds volume without clumps or flakes |
| Pick a Lipstick That Feels Like a Balm | Dry or lined lips | A creamy, hydrating lipstick adds color and comfort in one step |
| Set Lightly So Makeup Stays Put | Makeup that fades by lunch | A fine mist locks the look without adding powdery texture |
| Use Fewer Brushes, But the Right Ones | A simpler, faster routine | The right brush blends better than fingers and wastes less product |
| Do Your Makeup in Good Light | Every step of the routine | Daylight style light shows true color so nothing surprises you outdoors |
1. Start With a Hydrating Primer
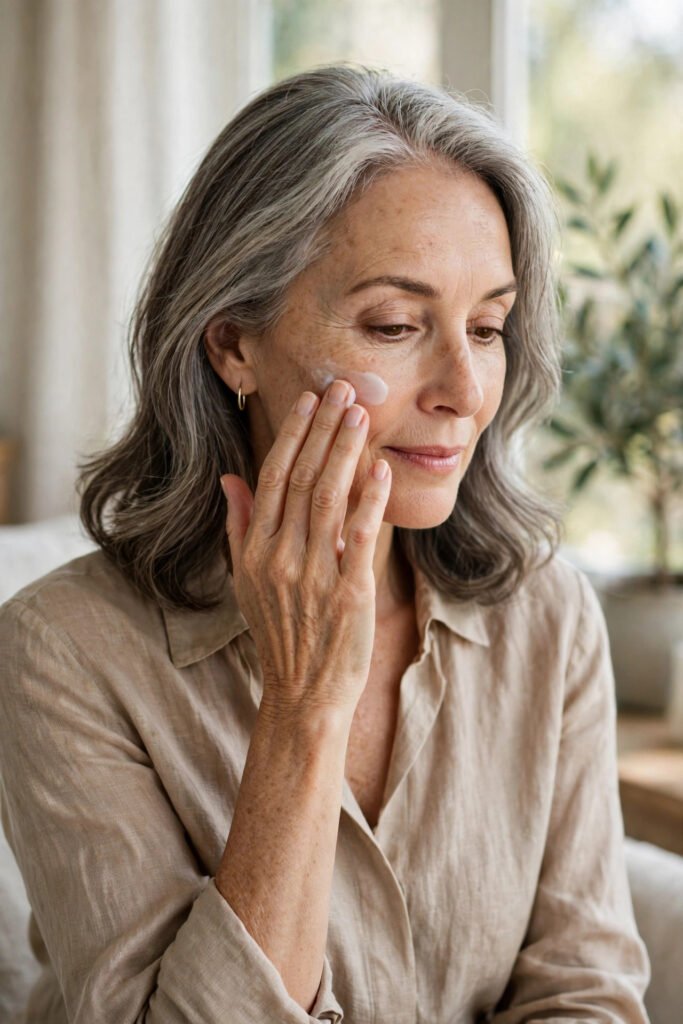
After 50, skin tends to lose moisture faster, and foundation applied straight onto dry skin can look patchy by midday. A hydrating primer solves the problem before it starts. It gives foundation something smooth and slightly grippy to hold onto, so color goes on evenly and stays even, instead of clinging to dry patches and sliding off oily ones. Think of it as moisturizer with a job: it preps the surface so everything that follows behaves better.
A pea sized amount is plenty for the whole face. Press it in with your fingertips, let it sit for about thirty seconds, and then apply foundation. That short pause matters, because it lets the primer settle into a thin, even film rather than mixing with your foundation into a streaky layer. If your skin is very dry, you can layer primer over your usual moisturizer; if it is combination, focus primer on the areas where makeup tends to fade first, usually around the nose and chin.
Styling tip: If your foundation looks perfect at nine in the morning and patchy by lunch, the problem is usually the base, not the foundation, so fix the primer first before buying a new foundation.
Shop the look: e.l.f. Power Grip Primer, gentle moisturizer, lightweight foundation, clean fingertips or a damp sponge.
2. Choose a Lightweight Foundation That Moves With Your Skin
Heavy, full coverage foundation is the single fastest way to make mature skin look older, because thick formulas settle into fine lines and emphasize texture they were meant to hide. A lightweight, serum style foundation does the opposite. It evens out tone and redness while letting your real skin show through, so the finish reads as healthy skin rather than as makeup. Coverage should come from evening the tone, not from masking the face.
Apply it from the center of the face outward, blending toward the jaw and hairline, and use less than you think you need. You can always add a second thin layer where you need more coverage, on redness around the nose or uneven tone on the cheeks, but one thin layer over the whole face almost always looks better than one thick one. A damp sponge gives the most natural finish, because it presses product into skin instead of dragging it across the surface.

Styling tip: Match foundation to your neck and chest, not to your hand, and check it in daylight before you leave, because indoor light can make a shade look right when it is actually too light or too warm.
Shop the look: L’Oreal Paris Age Perfect Radiant Serum Foundation, damp makeup sponge, hydrating primer, soft blush.
3. Brighten Under Eyes With a Light Hand
Dark circles and tired looking eyes are the complaint women over 50 mention most, and the instinct is to pile on concealer until the darkness disappears. That backfires, because thick concealer under the eyes creases within an hour and draws more attention to the area, not less. The fix is a light hand: a small amount of creamy, moisturizing concealer, placed only where the darkness actually is, usually the inner corner and the hollow beneath the eye, then gently tapped in with a fingertip or sponge.
Choose a shade close to your skin tone, or just one shade lighter, and resist the urge to go much lighter, because a too light triangle under the eye reads as makeup from across the room. Let the concealer warm on your skin for a few seconds before blending, so it melts in rather than sitting on top. If fine lines worry you, skip powder under the eyes entirely; a tiny amount of concealer left unpowdered looks fresher all day than a powdered layer that cracks.

Styling tip: Apply concealer after foundation, not before, so you only cover what foundation did not already even out, which means less product and less creasing.
Shop the look: Maybelline Instant Age Rewind Eraser Multi Use Concealer, lightweight foundation, damp sponge, gentle eye cream.
4. Let Cream Blush Do the Lifting
Powder blush on mature skin can look dusty and can settle into texture, especially on cheeks that have lost some fullness. Cream blush behaves completely differently: it melts into skin, looks like a flush coming from within, and gives cheeks a gentle lift that powder rarely achieves. Because it blends with your skin rather than sitting on it, cream blush also survives the day better, fading gracefully instead of turning patchy.
Placement matters as much as formula. Smile softly, then place color on the apples of the cheeks and blend upward toward the temples, not down toward the nose. That upward direction is what creates the lifted look. Start with one small dot per cheek, because cream formulas are more pigmented than they look, and build slowly. A rosy or soft coral shade flatters most skin tones and pairs beautifully with a neutral lip.

Styling tip: Apply cream blush with your fingers or a damp sponge rather than a brush, because the warmth of your skin helps the color melt in and look like your own healthy flush.
Shop the look: e.l.f. Camo Liquid Blush, lightweight foundation, damp sponge, soft rose lipstick.
5. Fill Brows Softly, Never Harshly
Brows frame the whole face, and as they thin with age, filling them in is one of the highest impact steps in any routine. The mistake is drawing a solid shape, which looks harsh and instantly dated. The better approach is to mimic real hairs: short, light, upward strokes in the sparse areas, following the natural direction of your brow hairs, then brushing through with a spoolie to soften everything. The goal is a brow that looks fuller, not a brow that looks drawn.
Color choice is half the battle. Go one shade lighter than your natural brow color if your hair is dark, and a soft taupe or ash tone if your hair is grey or silver, because a color that is too dark or too warm is what makes filled brows look obvious. Work from the inner brow outward, using the least product at the front of the brow, since a heavy inner edge is the most common giveaway. Step back from the mirror after each brow so you can check that both sides match in fullness, not just in shape.

Styling tip: Brush brows upward first with a clean spoolie before filling, because seeing the natural shape clearly means you only fill the gaps instead of redrawing the whole brow.
Shop the look: NYX Professional Makeup Micro Brow Pencil, clean spoolie brush, brow scissors for stray hairs, magnifying mirror.
6. Keep Eyeshadow Matte and Close to Your Skin Tone
On mature eyelids, shimmer and glitter are risky, because light catching particles draw attention to creases and texture. Matte neutrals do the opposite: they add gentle definition and depth without calling attention to the lid itself. A palette of soft rosy and warm brown mattes is the most versatile choice, because those shades work with every eye color and every occasion, from a morning errand run to a dinner out.
Use just two shades for an everyday look. Sweep the lighter shade over the whole lid to even the tone, then press the slightly deeper shade into the crease with a soft, fluffy brush, blending until there is no visible edge. Keep the color above the lash line and below the brow bone, and blend upward with a light hand, because harsh edges age a look faster than any color choice. A tiny touch of satin, not glitter, on the inner corner can brighten the eye without emphasizing texture elsewhere.

Styling tip: Prime lids with a dab of concealer or primer before shadow, because shadow applied to bare lids creases fast, while shadow on a primed lid stays smooth for hours.
Shop the look: Urban Decay Naked3 Mini Eyeshadow Palette, fluffy blending brush, eyelid primer or concealer, soft brown eyeliner.
7. Smudge Your Eyeliner, Never Draw a Hard Line
A sharp, black, liquid line can look striking on younger eyes, but on mature eyes it often looks harsh, and it tends to transfer onto the crease or smudge unevenly as the day goes on. A soft pencil line, smudged gently along the upper lash line, gives you the same definition with none of the severity. It makes lashes look thicker, eyes look larger, and the whole look stays soft and flattering.
Apply the pencil in short dashes right at the lash line, rather than one long stroke, then smudge immediately with a small brush, a cotton swab, or even your fingertip before the formula sets. Brown or soft charcoal is more forgiving than true black for everyday wear, because it defines without creating a stark contrast against skin that has softened with age. Lining only the outer two thirds of the upper lid, and leaving the inner corner bare, also opens the eye and avoids a closed in look.

Styling tip: Tightline by dotting pencil between the upper lashes instead of above them, because color sitting inside the lash line defines the eye without taking up any lid space at all.
Shop the look: L’Oreal Paris Infallible Never Fail Mechanical Pencil Eyeliner, small smudge brush, cotton swabs, volumizing mascara.
8. One Coat of Mascara, Applied Slowly
Clumpy, spidery lashes are almost always the result of rushing, not of the mascara itself. One slow coat, applied from root to tip with a gentle wiggle at the base, builds more believable volume than three hurried coats, and it avoids the flakes that land on cheeks by afternoon. Starting at the root matters, because depositing most of the product at the base is what creates the illusion of thickness, while the tips need only a light coating to look long.
If your lashes are fine or sparse, a brown black or soft brown shade looks more natural for daytime than the darkest black, and it is more forgiving if a little product touches the lid. Curl lashes before mascara, never after, because curling coated lashes can break them. And replace mascara every three months or so, because old mascara dries out, clumps, and irritates eyes far more than a fresh tube ever will.

Styling tip: Wipe the wand once on the edge of the tube before applying, because removing excess product first is the simplest way to prevent clumps before they start.
Shop the look: L’Oreal Paris Voluminous Lash Paradise Mascara, eyelash curler, soft brown eyeliner, gentle eye makeup remover.
9. Pick a Lipstick That Feels Like a Balm
Matte lipsticks that stay put for hours are tempting, but on mature lips they often feel tight, emphasize lip lines, and fade unevenly into a ring around the mouth. A creamy, hydrating lipstick is the better everyday choice: it adds color and moisture in one step, wears off gracefully instead of flaking, and keeps lips comfortable from morning to evening. Shades in the rose, soft berry, and warm nude families flatter most skin tones and pair with any outfit.
Prep matters as much as the lipstick itself. Exfoliate gently with a soft cloth once or twice a week, apply a plain lip balm and let it sink in for a minute before color, and blot once after the first coat before adding a second light layer. That blotting step is what keeps color from feathering into the fine lines around the mouth. If feathering is a persistent problem, a clear lip liner around the edge of the lips acts as an invisible fence that holds color in place.

Styling tip: Choose a lipstick one or two shades deeper than your natural lip color for everyday wear, because that range brightens the face without demanding a full face of makeup to balance it.
Shop the look: Maybelline Color Sensational Lipstick, Romantic Rose, plain lip balm, clear lip liner, soft cloth for gentle exfoliation.
10. Set Lightly So Makeup Stays Put
Setting powder has its place, but a heavy dusting over the whole face is one of the quickest ways to make mature skin look dry and powdered. A fine setting mist is the gentler answer: it locks foundation, blush, and eye makeup in place without adding any texture at all, and it melts the layers together so the finish looks like skin rather than like separate products. Hold the bottle about eight inches from your face, close your eyes, and mist in a light cross pattern.
If you do use powder, keep it to the areas that truly need it, usually the center of the forehead, the sides of the nose, and the chin, and apply it with a fluffy brush rather than a puff, so the layer stays sheer. Skip powder under the eyes and on the cheeks entirely, because those are the areas where powder settles into lines fastest. The goal of setting is to make makeup last, not to make it visible.

Styling tip: Mist setting spray once after foundation and once at the very end of your routine, because that sandwich technique holds the base and the color layers equally well.
Shop the look: Urban Decay All Nighter Waterproof Makeup Setting Spray, fluffy powder brush, lightweight foundation, cream blush.
11. Use Fewer Brushes, But the Right Ones
A drawer full of brushes looks impressive, but most everyday routines need only four tools: a foundation brush or sponge, a fluffy blending brush for eyeshadow, a small brush for smudging liner, and a soft brush for blush or powder. Good tools matter more than many tools, because a well cut brush blends product smoothly and wastes less of it, while a scratchy or shedding brush leaves streaks that no amount of blending will fix.
Wash brushes weekly with a gentle soap and warm water, reshape the bristles, and lay them flat to dry. Clean brushes apply makeup more evenly, last longer, and are kinder to skin that is more sensitive than it used to be. If you travel, a compact set that covers face and eyes in one pouch keeps the routine intact without taking up half the suitcase, and it means you never have to improvise with fingers in a hotel mirror.

Styling tip: Invest in the eyeshadow blending brush first if you buy one brush at a time, because it is the tool that turns harsh lines into a soft, professional looking finish.
Shop the look: Real Techniques Everyday Essentials Makeup Brush Set, gentle brush soap, damp sponge, small makeup pouch.
12. Do Your Makeup in Good Light
Every tip in this guide works better in good light, because the mirror you use decides what you see, and bathroom lighting is famously unkind. Overhead lights cast shadows downward that exaggerate under eye darkness and lines, while dim light hides color mistakes that daylight will reveal the moment you step outside. A lighted vanity mirror with daylight style LEDs, placed so light falls on your face from the front, shows your makeup the way the world will see it.
Check the finished look in two lights before you leave: your mirror light, and then natural light from a window. That second check catches the most common surprises, a foundation shade that looked right indoors, blush that is stronger than you thought, or eyeliner that is uneven on one side. A small magnifying mirror is also a kindness for detail work like brows and liner, letting you see clearly without leaning inches from the glass and losing the overall picture.
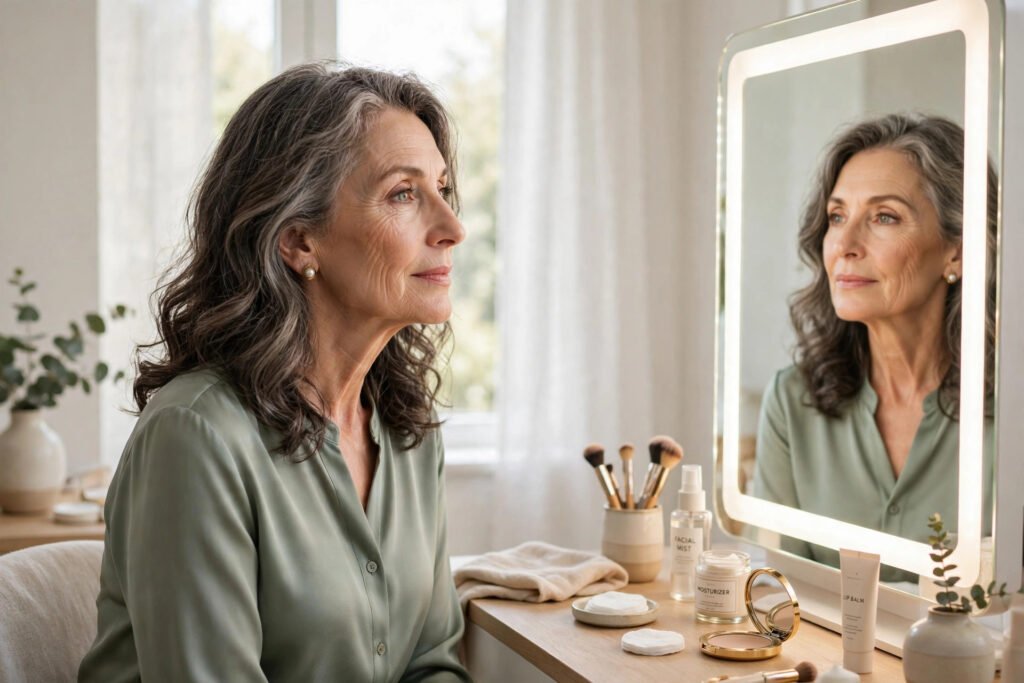
Styling tip: Face a window while you do your makeup whenever you can, because even the best mirror light cannot beat soft, natural daylight for showing true color.
Shop the look: Fancii Sora Lighted Trifold Vanity Mirror, magnifying hand mirror, daylight bulbs for the bathroom, a clean, well lit vanity space.
The principle to remember
Everyday makeup after 50 is not about hiding age; it is about working with skin that has changed. Light textures instead of heavy ones, cream instead of powder where skin is dry, soft edges instead of hard lines, and a light hand everywhere. When those relationships are right, makeup looks like you on your best day: fresh, rested, and polished, without ever looking like you tried too hard. Start with a good base, keep color close to your natural tones, and let the finish stay soft, because softness is what flatters mature skin most.
Your everyday makeup formula
Here is the whole guide in one line to carry with you: prime and hydrate, then one thin layer of lightweight foundation, a touch of concealer only where needed, cream blush blended upward, soft brows, matte neutrals on the lids, smudged liner, one slow coat of mascara, a creamy lip color, and a fine mist to set it all, all checked in good daylight before you walk out the door.
FAQ
How long should an everyday makeup routine take after 50?
About ten minutes once the routine feels familiar. Primer and foundation take three minutes, brows and eyes take four, and blush, lips, and setting spray take the rest. If your routine takes much longer, you are probably using too many products or too much of each one, so simplify before you add anything new.
Should I switch to all cream products after 50?
Not necessarily, but cream formulas deserve a bigger role in your routine. Cream blush, cream concealer, and creamy lipstick flatter drier skin beautifully, while a light liquid foundation and a matte eyeshadow still give structure. The best routine mixes textures on purpose: cream where skin needs moisture, and powder only where you need staying power.
What is the most common makeup mistake women over 50 make?
Using too much product, especially foundation and powder. Heavy layers settle into fine lines and draw attention to texture, while thin layers let real skin show through and look fresher. If you remember one rule from this guide, make it this one: start with half the amount you think you need, and add more only where you can still see a problem.
Can I wear bold lipstick or dark eyeshadow after 50?
Absolutely, and you should, whenever you feel like it. The trick is balance: a bold lip pairs best with soft, neutral eyes, and a deeper eye look pairs best with a quiet lip. Wearing one statement at a time keeps the look elegant instead of busy, and confidence carries the rest further than any rule ever will.